Inspired by some photos I took during last weekend’s trips around beautiful Oregon I found it is time for another “Instant Inspirations” post. This is my series for you if you feel you suffer from “Photographer’s Block” or simply want to shoot something that you have never tried. Or at least not recently. With Episode 15 I want to inspire you to go out and shoot long exposure waterscapes. For the how-to, more images and links to all previous editions of “Instant Inspirations” continue reading after the jump….
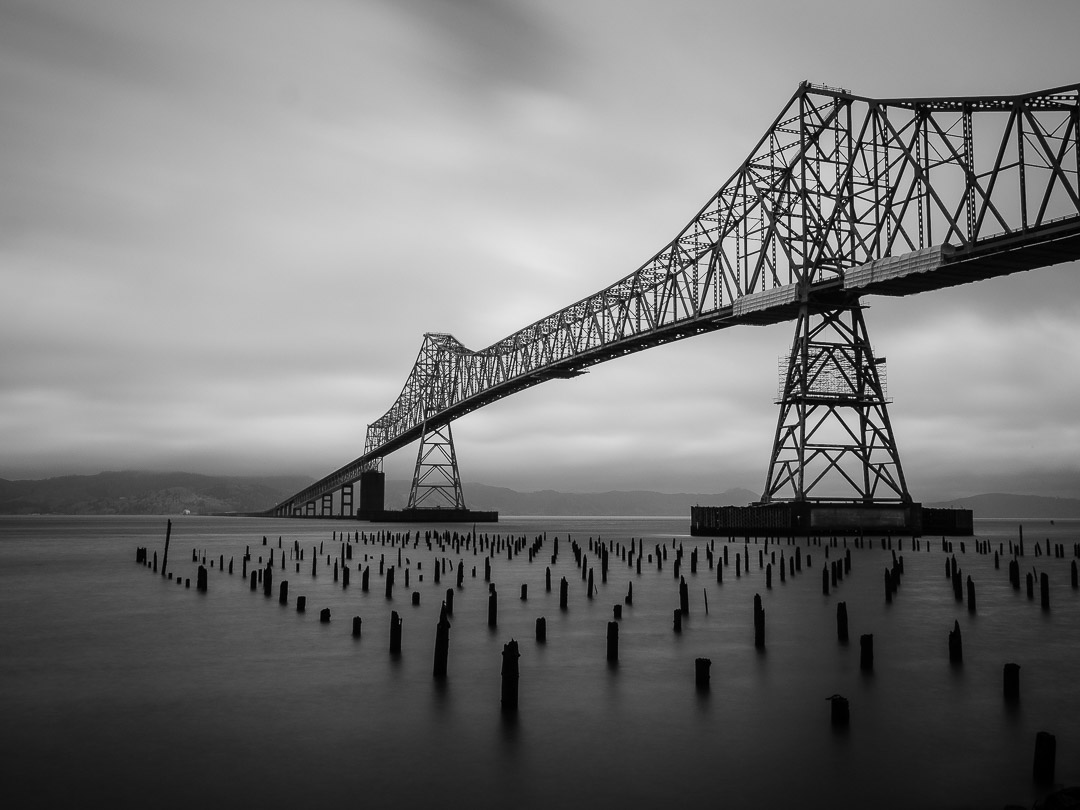
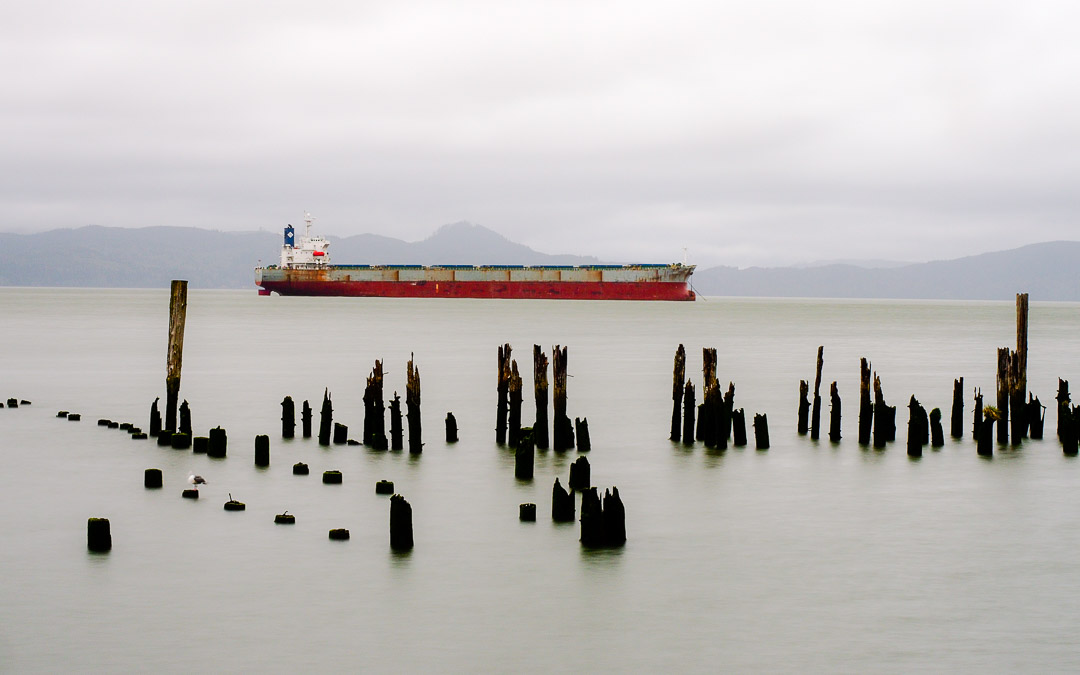
I’m sure you all have seen these photos of waterscapes that look incredibly smooth and have that ethereal, fairy like touch to them. This effect is simply created by using a very long shutter speeds. Water starts to smooth out at about 8 seconds, which some remaining textures to be seen. The longer you expose, the smoother it gets.
These long shutter speeds can’t be hand-held. So the first thing you need to do is stabilize the camera. Easiest is to use a tripod, but you also can rest the camera on any firm surface if available (like a rock, a barrier, a railing or even a bean bag). But best is a robust tripod, also safer for your camera. With landscapes you typically want a narrow aperture anyway to maximize depth of field, so that helps with achieving longer shutter speeds to compensate. You also want to dial in your lowest native ISO (on my Olympus cams that is ISO 200), also this results in longer shutter speeds in order to get a correctly exposed image.
But in daylight situations, even with an f-stop (aperture) as small as f/16 and the lowest ISO you won’t get more than a second of shutter speed, which by far is not enough to achieve the dreamy effects we are after. So what helps is the use of a neutral density (or ND) filter, which, as the name says, is neutral as it does not affect the color of the photos – it just cuts down on the amount of light entering the lens, like with a pair of very dark sunglasses. So this helps us to slow down shutter speed sufficiently to reach 8 seconds or longer even during the day. There are various types of ND filters (if you want to read more about it, here is a link to the Wikipedia post that explains it well). I go in with a ND3 that reduces the light entering the lens by 10 stops. I use the Haida 100×100 square filter system. Her I slide the glass filter into a filter holder attached to my lens with the help of an adapter (so it fits multiple lens diameters). But there are also round screw-on ND filters available that are easier to handle but can be used only on a specific lens diameter.
Measuring correct exposure and focussing with an attached ND filter can be quite a challenge. My Olympus cameras (both the PEN-F and the E-M1) still can focus through an attached ND3, at least if there are some hard contrast lines in the scenery that the focus can lock on to. Regarding exposure measuring, the Oly tends to underexpose by a stop and a half through the ND3. Knowing this I dial in positive exposure compensation accordingly. It is a bit of hit and miss, but usually after a try or two I’m spot on. If you have a camera that can’t focus and measure through the attached filter, do both without the filter first after composing your image. Make sure you use the narrowest aperture you are happy with and the lowest ISO. Attach the filter.
Calculate what the correct shutter speed should be. You need to double it for each stop the filter reduces the light by. So for a 10 stop reduction you need to double it 10 times. Easier is to use a calculator tool that many photo apps on IOS or Android provide. Believe me, it is much easier than it sounds. A bit of practice and you are set up in less than two minutes.

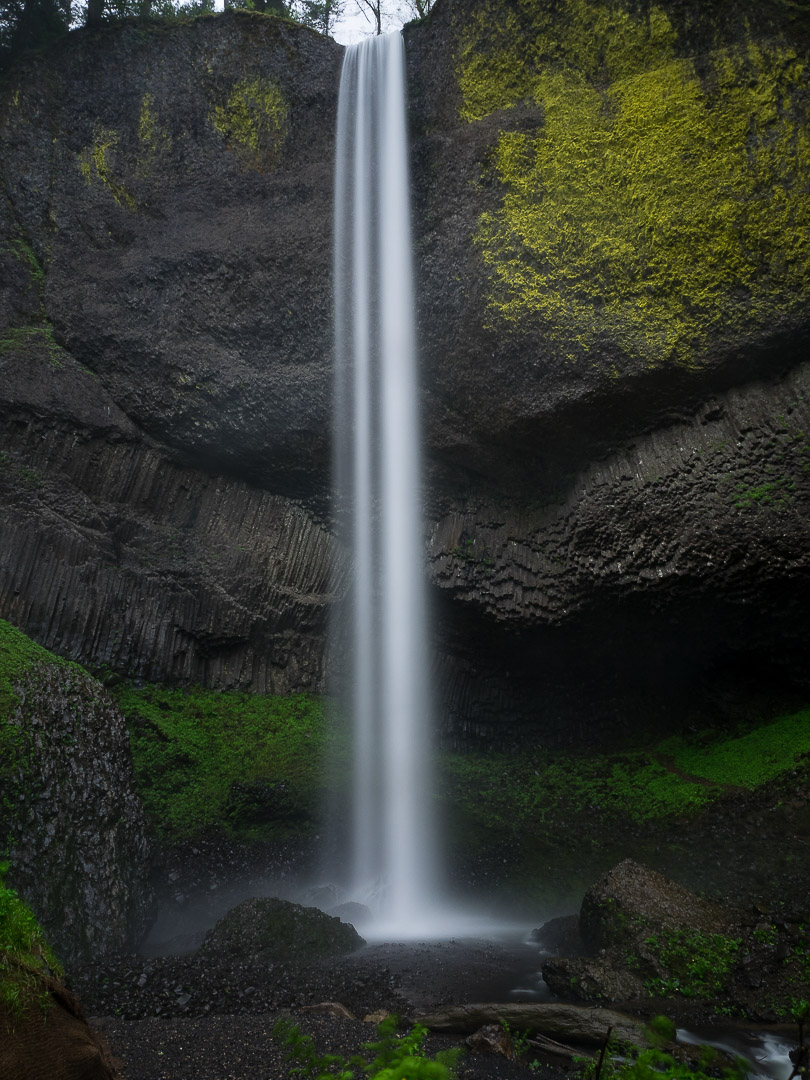
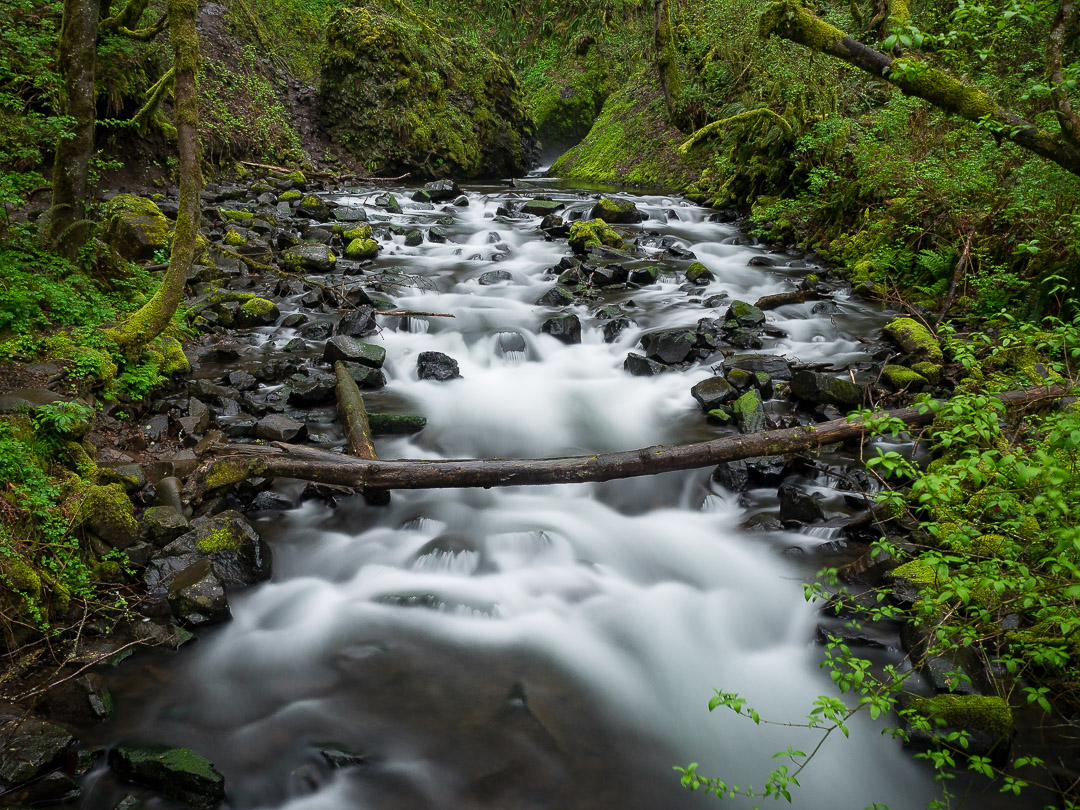
The photos at the Columbia River I took with my Olympus PEN-F with the mZuiko 12-40mm F/2.8 Pro Zoom. The waterfall photos I took with the same lens but the E-M1 for the reason it was raining and this combo is fully weather sealed.
Obviously there are many more possibilities to use the ND filter, you can create smooth cloud effects just the same or “empty” crowded streets or monuments by using long exposure times that magically let moving people disappear. But this is for another episode of “Instant Inspirations”.
There are really plenty possibilities to capture the dreamy effects of long exposure waterscapes. You only need a ND filter (for shots during the day) and a tripod. Take your camera and head to the next creek, river or lake that shows some movement on the surface.
Most of all go out and have fun.
Have a great week!
Marcus
Related Posts:
Instant Inspiration (I) – Get Down Low
Instant Inspiration (2) – Motion Blur
Instant Inspiration (3) – Silhouettes
Instant Inspiration (4) – Juxtaposition
Instant Inspiration (5) – Puddle Shooting
Instant Inspiration (6) – Storefront Windows
Instant Inspiration (8) -Make a portrait of a stranger
Instant Inspiration (9) – Concert Photography
Instant Inspiration (10) – Nocturnal Skyline
Instant Inspiration (11) – Change of Perspective
Instant Inspiration (12) – Playfulness
Awesome photos and thanks for sharing the camera info too. Definitely going to use this as inspiration for shooting photos in Tanzania!
You‘ll love Tanzania, was there two years ago in it was awesome! Thanks so much for your kind words! Marcus
Yes can’t wait to explore more!
Gorgeous shots – I’m too lazy to deal with technical stuff and planning photo shoots, but I’ve been wanting to try a long exposure of water for ages! Just can’t find the right location for it in my home town…
Thank you ! Best of luck for water surface hunting 😉
Wow just wow, you continue to deliver and these pictures are stunning and putting mine to shame. I have work to you 😉 thank you for the inspiration. Love, love it and you are so talented my friend.
Thanks, but so not true, you have so many stunning photos yourself. And you are so much more the better writer, your flow of thoughts and words is so amazing! xox
Well that is a matter of opinion isn’t it lol. But thank you for your kind words as always my dear friend and have a great weekend. Hugs
Beautiful captures of the flowing water — one of my all time favourites of nature! 🙂
Cheryl
Thank you Cheryl, this means a lot! Marcus
Dreamy photos! And thank you for your easy-to-understand explanations 🙂
Thanks, Vanessa, love your feedback! Marcus
Nice Photo
Thanks, Ruby, much appreciated! Marcus
Very informative and helpful tutorial. Beautiful photos.Thank you.
Thank you so much, love your feedback. Marcus
Wow. These are gorgeous Marcus! Absolutely gorgeous. That waterfall looks like a dream! Beautiful shots! 🙂
Thanks, Janet, this means so much! Marcus
The top two photos remind Geelong harbour near Melbourne, Australia where I took the photos you commented on on my blog – Collages. The photos of the waterfall are beautiful. Your technical expertise is something to aspire to.
Thank you, Suzanne, I really appreciate your kind words, it means a lot! Marcus
How beautiful! I have been saving up for a tripod, and hope to buy one this week. I only have an SL bridge camera (apart from a compact), could I get effects like these with mine?
Thanks so much, Jill. Yes, a SL bridge should be able to generate these effects, you just need to be able to fully control shutter speeds / aperture / ISO and you need to be able to attach an ND filter to the lens. If not, you need to wait for low light situations to achieve these kind of shutter speeds. Invest in a good ND filter, the cheap ones often produce a colorcast that is tough to get rid of in postprocessing. Enjoy your tripod 😉! Marcus
Thanks for the advice, I need to practice with this camera and try to figure it out. I’m not very technically minded, sadly.
Even with the weather not being ideal, you got some great shots.
Thank you so much, Tim, I feel the same way. There are a few more to come 😉 had a productive weekend ! Marcus
You’re welcome and I do look forward to seeing the other images.
Hi, Marcus!
I’ve read your blog and it’s very professional and great written.
And your photos are just AWESOME. The composition, colors are simply very well chosen. One word: PERFECT.
So, success and go on! Thank you for the high-quality content and photos.
– Daniela
https://myphotoshop2017.wordpress.com
Hi Daniela, your kind words make me really blush, and they are greatly appreciated! Thanks for leaving the link to your blog, which has so much great content that I look forward to explore! Marcus
Multnomah Falls photo is just amazing, colors are so natural. Thank you for inspiration.
Beautifully shot, Marcus. Love the long exposures– your B&W of the bridge and piers is a stunner and the last image of the bridge and waterfall is wonderful.
Thank you, Jane, you know how much I value your words. So much appreciated! Marcus